Antoni's clockspring replacement
The clockspring on the dodge stealth and mitsubishi stealth allows the steering wheel to be turned 360°+ and still keeps the connection
to the electrical components. This includes the horn, radio buttons, cruise control, and airbag. If anyone of these don't function or if more
than one does not function your clockspring may be to blame. Most of the times the srs light will come on but only a dealer can scan for this
to see if it is in fact your clockspring.
DISCLAIMER: Serious injury can be a result of improper removal/installation techniques do to the airbag.
Tools needed: Basic hand tools.
Parts needed: Clockspring, if buying used, use a mulitmeter to test continuity. The service manual has detailed directions.
Please read all of these directions. They are a combination of the service manual and my own detailed findings.
I am not responsible for an airbag going off. I used these directions and everthing went a-ok.
Before you start you must straighten out the wheels/steering wheel, this will ensure that the clockspring is centered as you will see later on.
Also it is a good idea to have the car in a place where you can jack up the front wheels, that will make it alot easier to spin the steering wheel later
to make sure nothing is binding.
Next step is to disconnect the negative battery terminal. This will cut power to the srs unit so the airbag won't go off accidentally. The service
manual says to wait at least 60 seconds to make sure there is no power left going to the srs unit. I waited a couple minutes just to be safe.
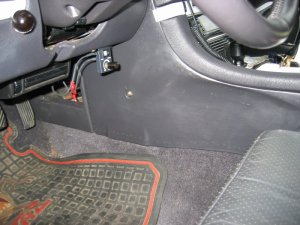
There is some pre removal before you can start getting into the actual wheel. I found it easier to do it all at once before getting to wheel/airbag
Itself. Begin with removing the side console carpet. There will be a screw on the side, a plastic pop tap by the gas pedal, and some blind plastic
tabs on the side of the console.
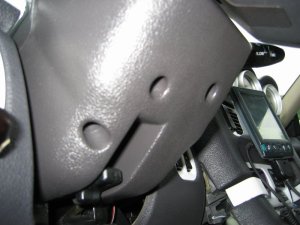
Now you must remove the casing that goes around the steering column. There will be some screws that screw the bottom into the top. Remove those then
gently pry the two halfs apart and remove them. You may need to adjust the column up and down in order to get these pieces out.
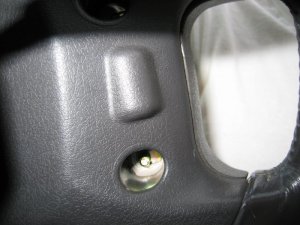
Next you need to remove the knee protector dash panel. Pop out the rheostat garnish, the switch garnish and disconnect the connections. This will expose
a 10mm bolt in each hole. There are two more in the lower left and lower right of the protecter. I found that you do not need to remove the hood release,
simply rest the knee protector on the floor.

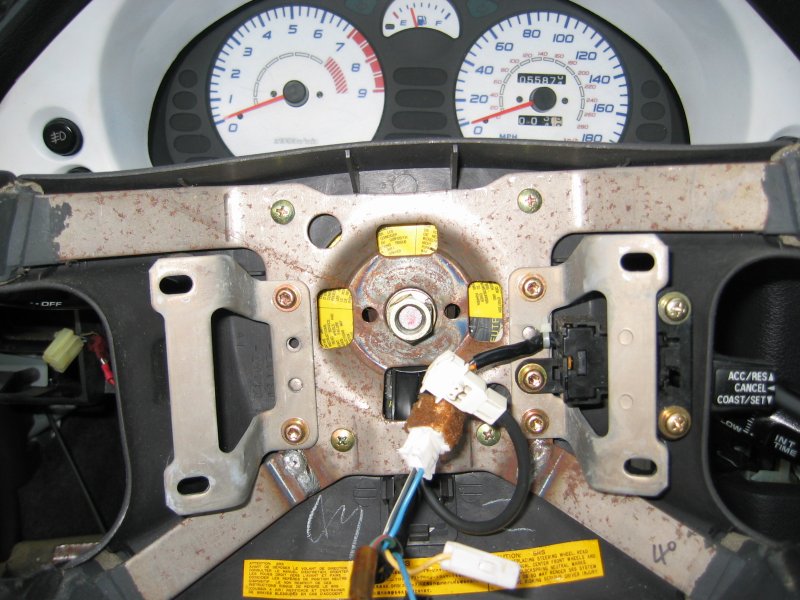
Now you should have full access to the connections the clock spring makes in the dash area and we can begin removing the steering wheel. The airbag is
bolted to the wheel with 4 10mm nuts from behind.
DISCLAIMER: Serious injury can be a result of improper removal/installation techniques do to the airbag.
Be careful when removing the airbag. After the 4 nuts are removed the airbag should be loose but will still have the electrical connections. There
are connections for the radio controls, cruise control, horn, and the airbag itself. The manual says to pry the connection to the airbag with a flat
screwdriver. Be careful not to break the tabs that hold it on. The rest just have a sqeeze tab so they should disconnect easily.
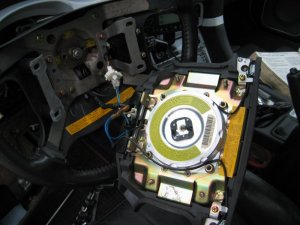
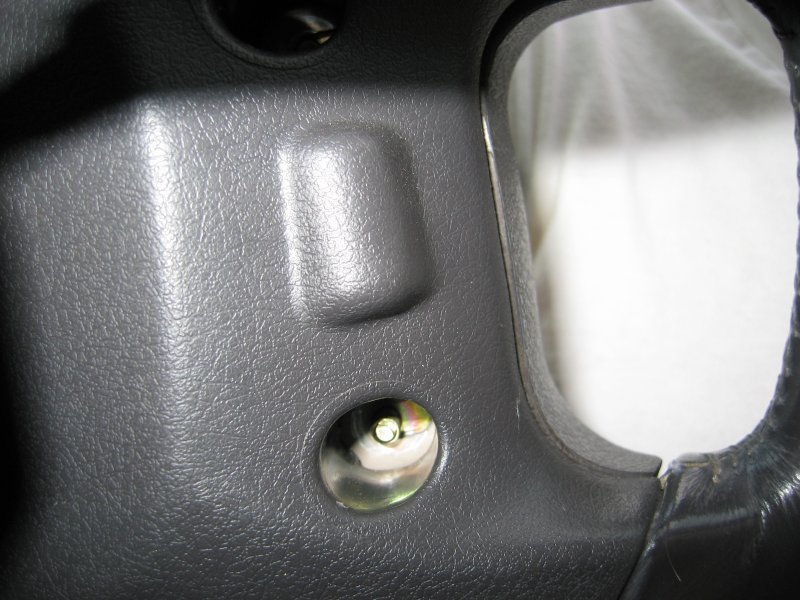
You should now be looking at a steering that is attached with a 17mm nut at the center. Make sure that the steering wheel is center and the wheels are
straight before continuing, this will ensure proper clockspring alignment. There is a special tool that holds the steering wheel while you back the
nut out If you do not have this either have someone hold the wheel tightly, or wedge a long bar in between the spokes of the wheel. The manual says not to
bang/hammer on the wheel as it might damage parts of the steering. I used the bar for my floor jack. If the wheel ends up getting turned make sure you
center it up before pulling it out. There will be a plastic cover piece where the wires come through the wheel, be careful not to break the plastic tabs.

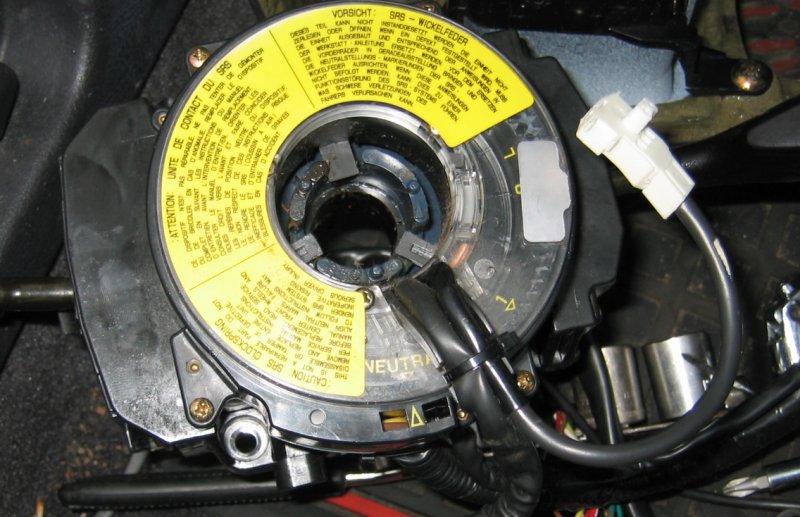
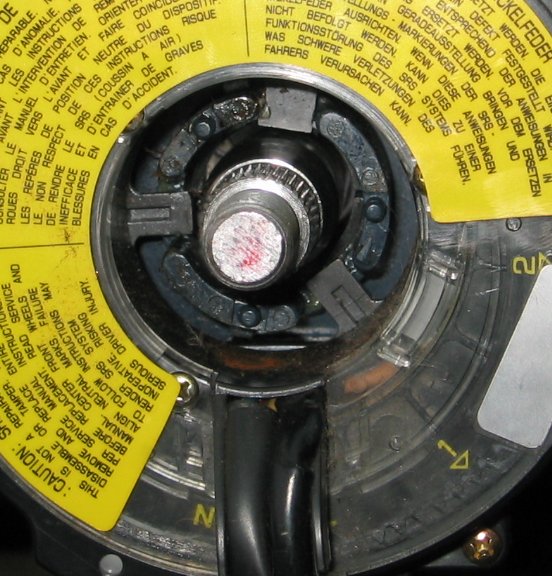
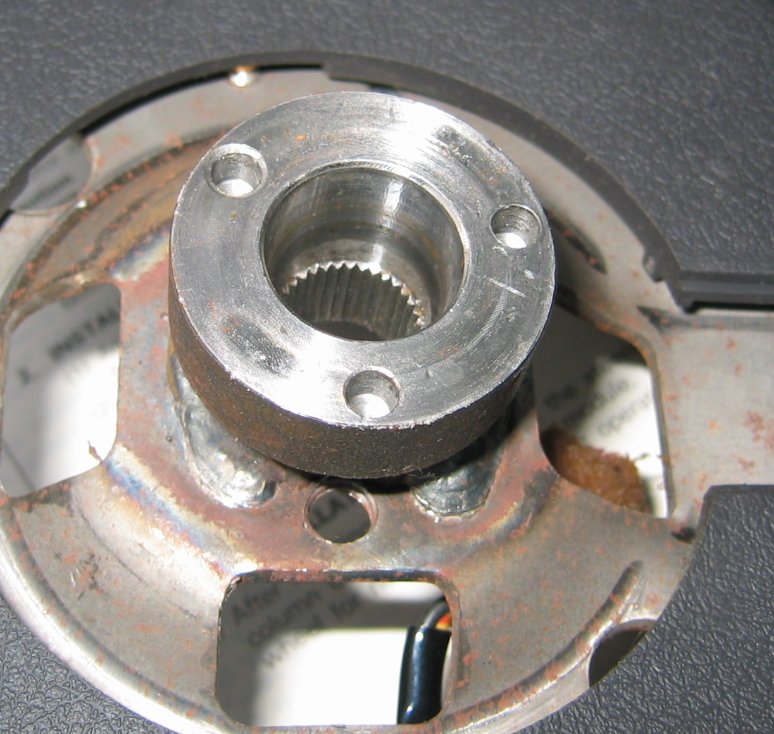
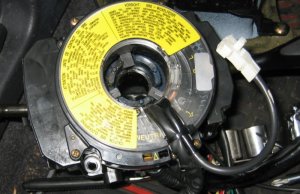
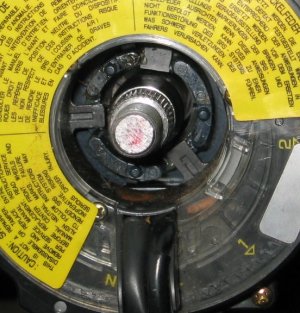
Now you should be looking at the clockspring if everything is centered up nicely, the two marks should line up. Says nuetral and an arrow. In the picture
below you'll see the word nuetral and an arrow pointing up to it. It is slightly off because to be perfectly neutral the wires would cover that up but
just so you see what i'm talking about. What I noticed on my clock spring was what looked to be a piece of silver tape. I think this was taped when it's
new to ensure the clockspring stays centered. Since I had two used pieces, I can not verify this.
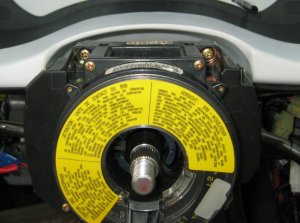
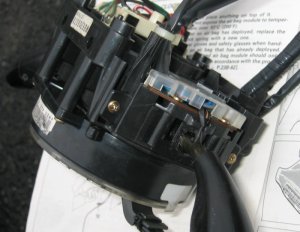
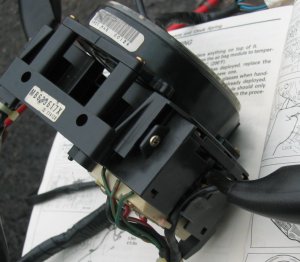
The clockspring as well as the piece that holds the blinker and wiper arms is held to the column with three screws. Top left, top right, and bottom left
corners. Since I got a used unit I got this whole piece, but new may only include the clockspring without the blinker/wiper arm mount. You could always
just unscrew the clockspring from the arm mount but i didn't realize this til after.I found it easier to unscrew these before pulling out the unit so it's
easier to identify which electrical connections are part of the clock spring and which aren't. Pictured below you can see the top two bolts that hold the
whole unit on. They are recessed the farthest and are bigger.
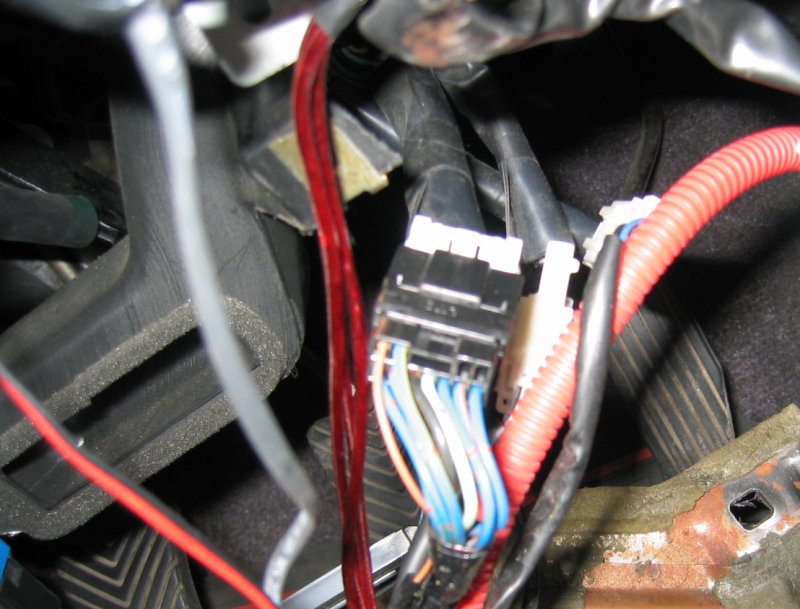
Once that is loose you can now disconnect the electrical connections. If you plan on removing the whole unit with the wiper/blinker arms you will have
a couple more connections. There is a big connection for the blinker on the left side of the steering column.
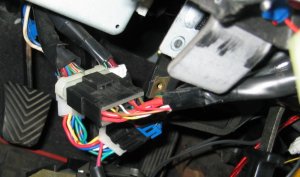
Now you can disconnect the connections on the right side. There will be a bunch of smaller ones this time.


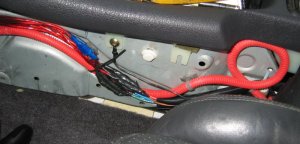
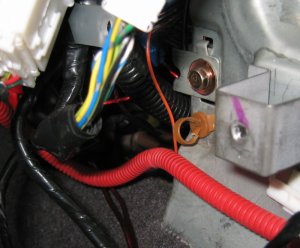
Ok, now you'll still notice that the unit is still connected by orange wire loom. This snakes its way along side the console and under the armrest into
the srs unit. You will need to follow this and disconnect it. First start by unhooking the plastic tabs/zipties that hold the wireloom to the side of the
console. I found it easier to cut these and use zipties to reinstall. You could always use plyers on the other side and save them or cut them and buy
new ones.
Now you'll find the loom snaking its way under the armrest box. Open up the top and you'll notice two brass screws toward the back and a plastic panel
covering the two in front. Pop the plastic panel off the front and you'll be able to access the screws underneath. The whole unit will then lift out.
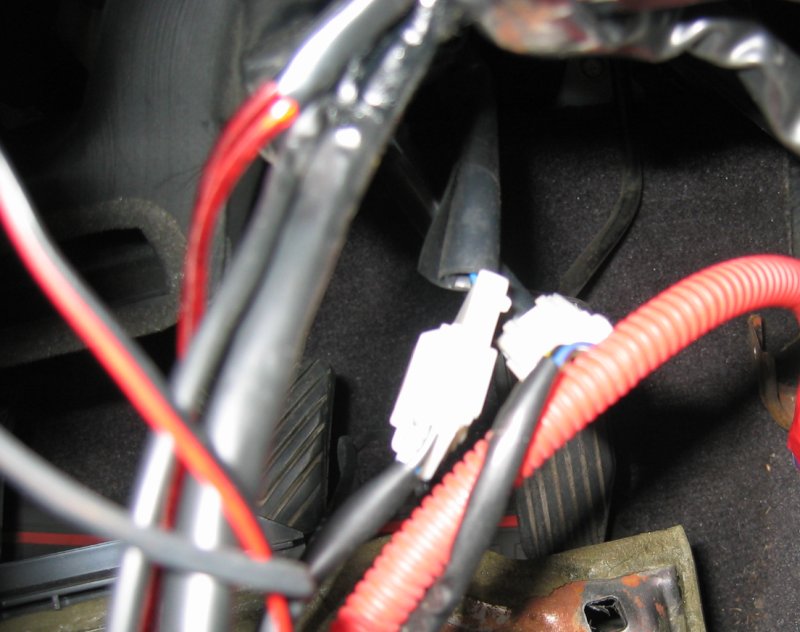
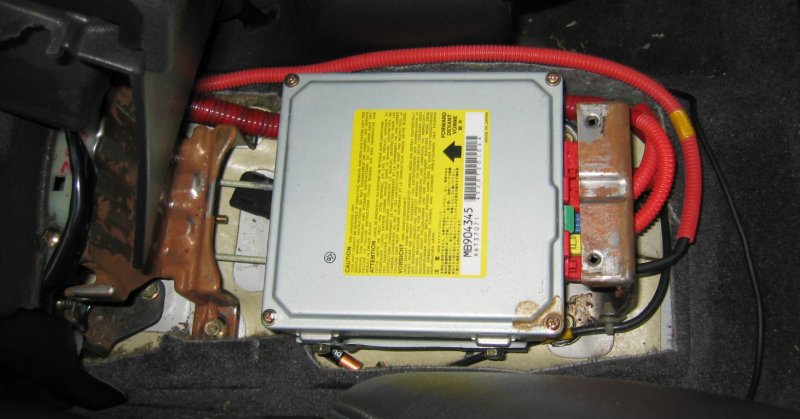
You should be staring at the srs unit now. Be careful not to bang or mess with it.

The clockspring connection is the one closest to the drivers seat and has a red connecter. It it secured via a double locking mechanism. In order to
access it i found it easier to unbolt the armrest bracket. There are two 10mm bolts, one on the passengers while the other on the drivers.

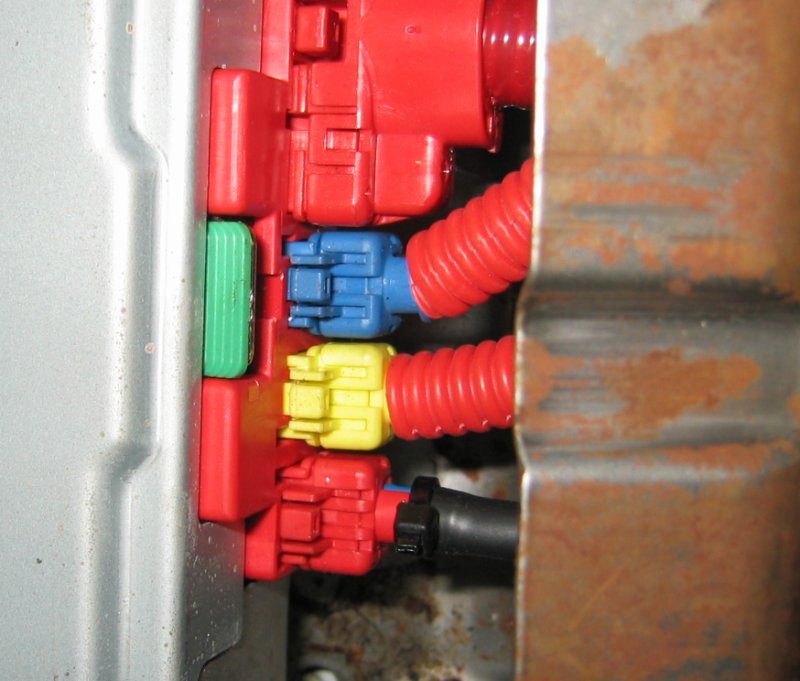
Now you should notice there is a green tab. At first in its locked position, the green tab will be down.
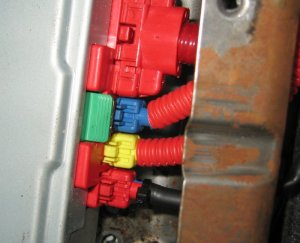
In order to unlock it you have to push the metal
wire towards the srs unit with the tip of a screwdriver. Do not try to pry the tab up or wedge the screwdriver between the wire, tab, or srs unit as you
will damage the unit. Just push on the wire and the green tab will automatically pop up.

You can now push the tab on the small red connector for the clockspring and pull the connection out. The clock spring should now come out along with the
wiring.
If you removed the clockspring as well as the blinker/wiper arm mount follow these next steps to make the swap. There are two are two screws that hold both
units on. They are above and below the arms. Back them out and the two units should slide out where you can transfer them to the other arm mount. Again this
is only if you have a used clockspring that has the arm mount. You could always just unscrew the clockspring from the used arm mount but I didn't realize this
til after.
Now you can begin installation, Start by feeding the orange loom to its original location and plug it into the srs unit. Push down on the green tab to lock
it in place. Zip tie the loom to the console or use the plastic zip tie tabs. Reinstall the clockspring on the column and make all the neccessary connections.
they should only fit in one connection. Now after you got them all connected back up you need to realign the clock spring to neutral. As you can see below
the arrow should be pointing to neutral, you will have to look under the wires coming out.
Now you can put the wheel back on. Make sure the wheels are still straight and the clock spring remains in neutral. There are 3 holes in the back of the wheel
and 3 tabs on the clock spring. These should line up when your placing the wheel back on.

While you are placing the wheel back on make sure to install the plastic cap where the wires go through. Also the wheel should be straight, the clock spring should be
in neutral, and those holes should line up. This will ensure proper clockspring alignment. After this is done, bolt on the split washer and nut. This is a good
time to test operation. Jack the front of the car up so the wheels turn easily. Turn the wheel from side to side and listen for any binding sounds and make sure
everything is operating properly.
DISCLAIMER: Serious injury can be a result of improper removal/installation techniques do to the airbag.
You may now carefully reinstall the airbag making all the proper connections. Go ahead and reinstall the rest of the parts and reconnect the battery. Your clockspring
should now be functional.
Copyright Antoni Koziol 2004